Cyberduck
Cyberduck is an easy way to open and download RDR collections in Windows or MacOS. In this manual, we will show you how to install and use Cyberduck in Windows. The Cyberduck interface for MacOS is very similar so it will not be described separately.
If you encounter problems or errors when using Cyberduck, you can contact the ICT helpdesk (email: icthelpdesk@ru.nl, telephone: 0031 (0)24 3622222).
Note: Please do not use versions of Cyberduck older than version 4.8.4.
Step 1: Install Cyberduck
If you are a Radboud University employee and have access to the Software Centre, you can download CyberDuck via the Software Centre. Otherwise, you can download the installer from the CyberDuck website. Once you have downloaded it, follow the instructions in the installer.
Step 2: Configure Cyberduck
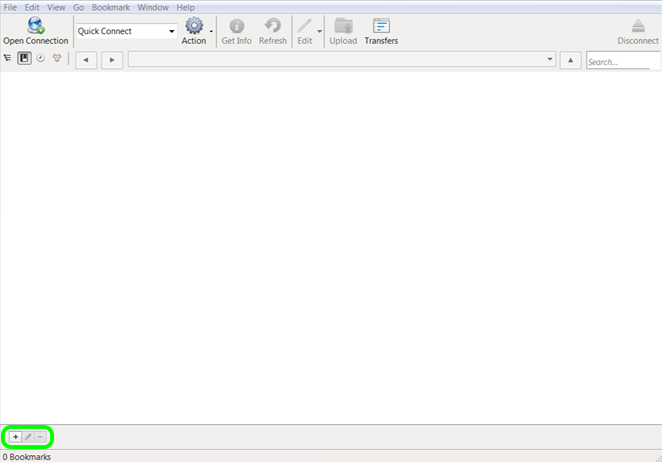
When you open Cyberduck after installation, the interface will not show any collections. To work in a collection with Cyberduck, you first need to create a new bookmark. Click on the ‘+’ sign on the bottom left of your screen to create a new bookmark.
A pop-up window will appear. In this window you must configure the bookmark as follows:
Select ‘WebDAV (HTTPS)’ from the dropdown menu
Nickname: Add a name of your choice for the new connection
Server:
Open access: Enter public.data.ru.nl
OA for Registered Users, Restricted access and Reviewer access: Enter webdav.data.ru.nl
Optional for all: under More Options in the Path field you can enter the specific path to a collection you are visiting/reviewing. More specifically, enter the Server field as described and in the Path field enter the last part of the path, for example /rta/myproject001_dsc_457
Port: Select or enter port 443
Username and Password:
Open access: Leave both fields blank and check the box Anonymous Login under the Username field.
OA for Registered Users and Restricted access: Fill in your data access credentials. You can find these credentials on the top right of the RDR under [Your name] > Data access credentials
Reviewer access: Use the anonymous username and password of the data access account assigned to you when you followed the reviewer URL. These credentials can be found on the top right of your screen under the pseudonym reviewer of [collection name] > Data access credentials. There is no need to create an account to review a collection in the RDR
The configurations are saved to the bookmark automatically. Close the configuration window when you are done.
Step 3: Connect to the RDR
Double-click on the saved bookmark to connect to the RDR collection.
Note: If the WebDAV client (i.e. Cyberduck) has been inactive for two hours, you will be logged out automatically by the server. In this case, you will have to log in again.
Step 4: Open an RDR collection
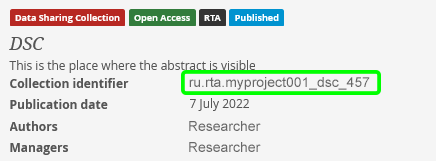
The name of the folder of a collection is based on the collection identifier. This identifier can be found in the RDR underneath the title and abstract.
The collection identifier consists of the following parts:
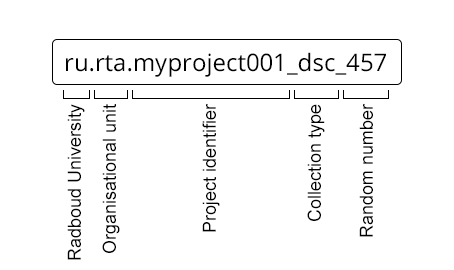
These parts correspond to the folder structure you currently see in Cyberduck (i.e. first the organisational unit and then the last part of the collection identifier).
Step 5: Downloading files
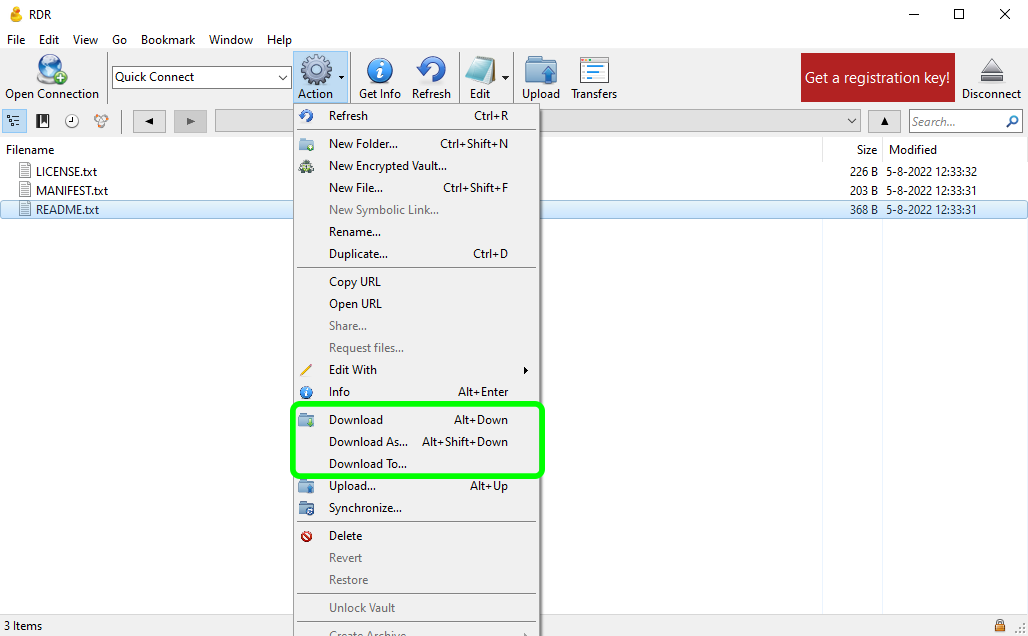
After opening a collection's directory you can download data as follows:
Select the file(s) or folder that you want to download
Click on the Action button on the menu bar. In the drop-down menu, choose one of the download options (i.e. Download, Download As… or Download To…)