Data access via the web portal
The easiest method to transfer data to or from the Radboud Data Repository (RDR), is via the web portal in the Files tab of the collection's landing page. This page explains how you can use the web portal to upload, manage, and download data. You can only use these features if you are a manager or contributor to the collection in question.
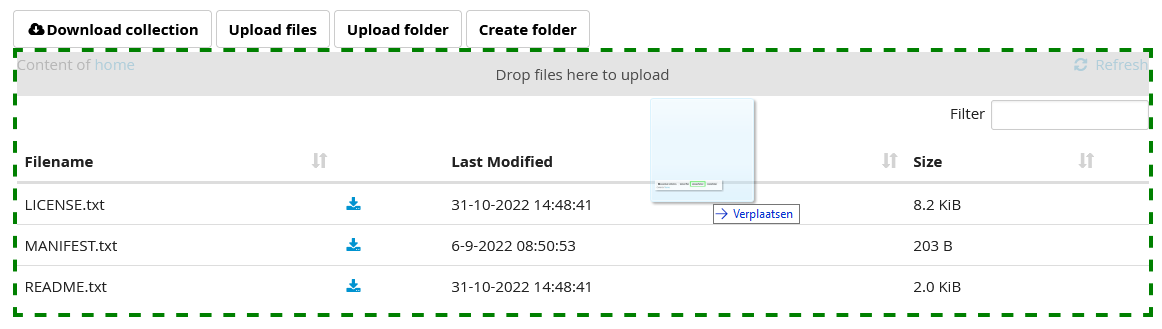
Uploading data
You can upload data via the Upload files and Upload folder buttons or by drag and drop. Note that there is an upload limit of 300 GB for a single file. If you want to upload files that are larger than 300 GB, try using WebDAV or contact us at `rdmsupport@ubn.ru.nl <mailto:rdmsupport@ubn.ru.nl>`_for Radboud University employees or datastewardship.im@radboudumc.nl for RUMC employees.
Go the collection's landing page and click on the Files tab
You now have three options to upload your files:
Click the Upload files button to upload one or several files:

Click the Upload folder button to upload a single folder (use option c to upload multiple folders at once):

Alternatively, you can drag and drop files or entire folders into the Files tab of the collection:
The RDR displays the progress of your upload per file. Once all files have been uploaded correctly, a message is displayed that all files have been uploaded. If your upload failed, the RDR lists all files that failed to upload. You should simply try again: the RDR will resume the upload from where it was disrupted. If your upload failed because you tried to upload more files than your collection quota allows, the RDR lists all files that cannot be uploaded because the collection quota has been reached. You should either clean up your collection by deleting files or request your administrator to increase the collection quota.
Managing data
To rename an uploaded file or folder:
Click on the rename icon behind the file or folder name:

Provide the new file name and click Rename file
To remove an uploaded file or folder:
Click on the remove icon behind the file or folder name:

Press Delete if you are sure you want to delete the file
To create a new folder:
Click on the button Create folder

Enter the folder name and click Create folder
Downloading data
You can download the entire collection at once as a tar.gz file, or download single folders (as tar.gz files) or files via the Files tab of the collection's landing page.
To download all files and folders of a collection, click the button Download collection, save the tar.gz file on your computer and unzip it

In the Files tab, all data folders and files of the collection are listed. To download a single file or folder, click on the download icon behind the file or folder name:
